
Introduction
Wigs are a fantastic way to change your look or add some flair to your hair without the commitment of a haircut or dye job. However, they’re only as good as their fit. The last thing you want is for your wig to shift or slide at an inopportune moment. That’s where wig clips come to the rescue. In this blog, we’ll guide you a step by step process of How To Sew Wig Clips To Hair Extensions, ensuring your wig stays securely in place.
Materials You’ll Need to Sew a clip in Wig:
Before we dive into the step-by-step process, gather the necessary materials:
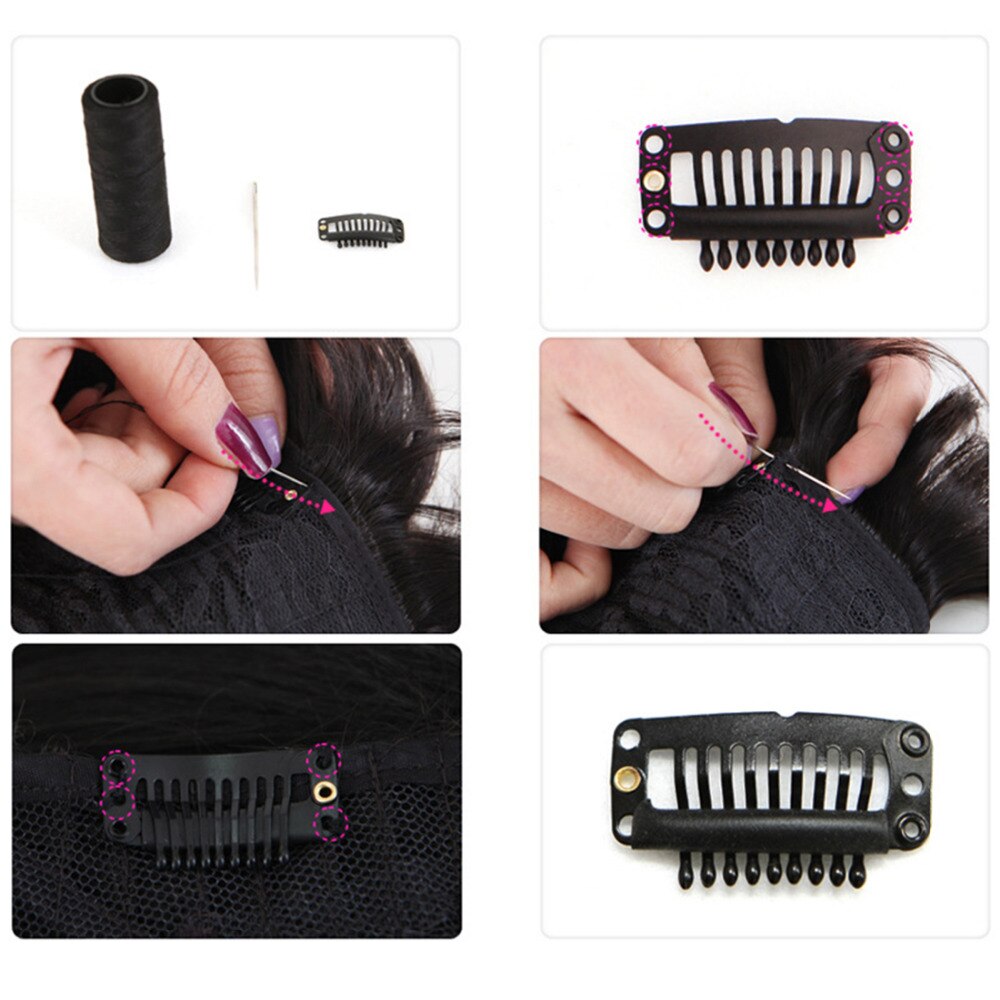
- Wig Clips: You can find these at beauty supply stores or online. They typically come in sets of 2 or 3.
- Needle and Thread: Choose a strong, matching thread that will blend well with your wig’s color.
- Scissors: You’ll need these to cut the thread and trim any excess fabric.
- A Wig Block or Mannequin Head: This will help you position the wig clips accurately.
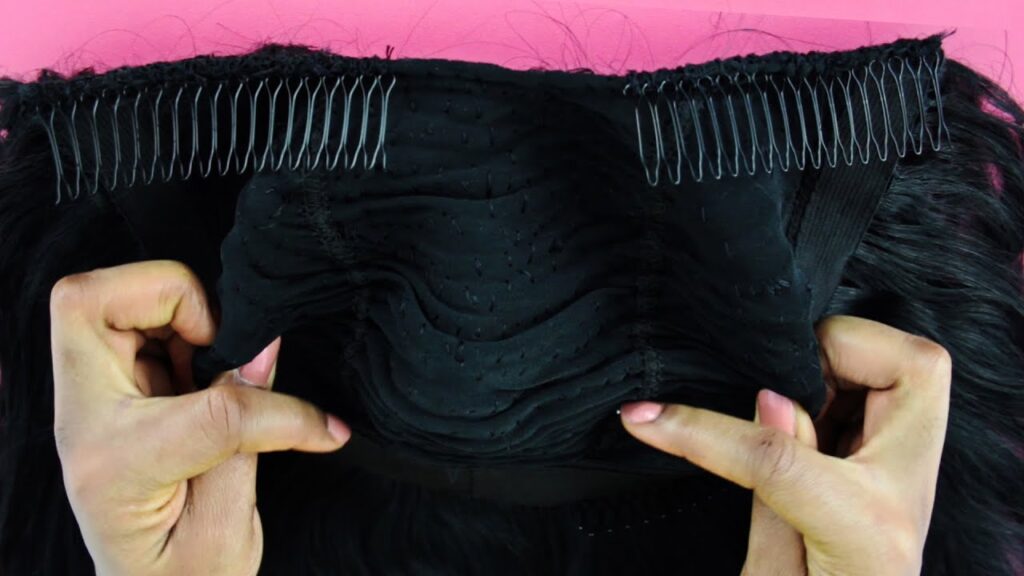
Step 1: Identify the Attachment Points:
Start by determining where you want to attach the wig clips. These attachment points should be evenly spaced around the perimeter of the wig cap, usually near the temples and at the nape of your neck. Using hairpins, secure the wig on the wig block or mannequin head to ensure it doesn’t shift during the process.
Step 2: Thread Your Needle:
Thread your needle with a length of thread, making a knot at the end. Double-threading your needle can provide extra security. Ensure that the thread color matches your wig, so it blends in seamlessly.
Step 3: Position the Wig Clips:
Take one wig clip and position it where you want it to go on the wig cap. Gently mark this spot with a washable fabric marker or a small safety pin. Repeat this for all the clips you plan to sew in.
Step 4: Sew the First Wig Clip:
Hold the wig clip firmly in place and insert your needle from the inside of the wig cap to the outside, coming out near the marked spot. Make a small stitch, and then pass the needle back through from the outside to the inside. Repeat this process several times, ensuring the clip is securely attached. Be careful not to sew through the hair of the wig itself.
Step 5: Secure with Knots:
Once you’re satisfied with the attachment, make a knot on the inside of the wig cap to secure the thread. You can repeat this process a few times for added durability.
Step 6: Trim Excess Thread:
Use your scissors to trim any excess thread on the inside of the wig cap, making sure it doesn’t poke through and cause discomfort.
Step 7: Repeat for Other Clips:
Repeat Steps 4-6 for the remaining wig clips, evenly spacing them around the wig cap. Be mindful of the tension to ensure the wig clips are securely attached without causing any distortion in the wig.
Step 8: Test the Fit:
Once you’ve sewn in all the wig clips, carefully remove the wig from the wig block or mannequin head. Try the wig on to make sure it fits securely and comfortably. Adjust the clips if needed.
Conclusion:
Sewing in wig clips is a simple and effective way to ensure your wig stays in place no matter where life takes you. By following these steps and paying attention to detail, you’ll enjoy a snug, comfortable fit that boosts your confidence and style. Whether you’re wearing a wig for fashion or necessity, the security and peace of mind that comes with properly sewn wig clips are worth the effort. So, go ahead and rock that wig with confidence!
https://thesewinginfo.com/how-to-setup-a-sewing-machine-step-by-step-guide/: How To Sew Wig Clips To Hair Extensions